For those of you who have bought a new smartphone or own one with RAW image capabilities (LG G4, Galaxy S6 with Android 5.1.1, Nexus 5/6), you may want to know that you can do much more with RAW images then standard JPEG (JPG) image files.
So, what is the difference between RAW and JPEG?
RAW images contain all the raw information from your smartphone camera’s sensor. Actually all smartphones process RAW images and convert them into JPEG. In other words, your smartphone does the adjusting like adding sharpness, contrast, saturation and other things to give you a final JPEG image. Now, some smartphones like the LG G4 and Nexus 6 allow the user to store RAW image files.
These RAW image files are 5-6 times bigger than normal JPEG files but they contain all the original information about your photo, allowing you to tweak it easily. From the naked eye, the JPEG image may look better than the RAW image files. This is because a JPEG image is a processed image while RAW images are essentially “raw” like its name implies.
Think of it this way, back when cameras weren’t digital, you could take your film and develop photos from it. The film is like RAW files while the developed photos are JPEG. With RAW files, you can easily edit/post-process them to make multiple versions of the same photo all without losing the details in your photo. You can also do that with JPEG files but since you don’t have as much information, your photo will easily degrade with too much adjustments.
So, why shoot in RAW?
RAW images allow you to get the perfect photo out of the shot. Of course, without any post-processing, your RAW images may look dull and perhaps worse than the JPEG version. But there are a million reasons to shoot RAW. For example, let’s say you took a photo of your daughter graduating from college and you took the photo into the sun, making your subject/daughter look very dark. With a RAW photo, you will easily be able to bring up the shadows, increase the exposure, and even add some saturation/vibrance to make the photo look great, as if you used a flash even. With a JPEG photo, you will be able to edit it but may end up with a degraded photo that doesn’t look detailed. In other words, with RAW image files, you will be able to maximize the quality of your photos.
So, how do I edit RAW images?
This is probably the part no one understands unless you are already a photographer. My best advice is to actually use a desktop software like Adobe Photoshop or Lightroom to edit your RAW files as they are very big files and much easier to edit on a big screen to see the details. But, you can use the Lightroom App for Android, which comes with most of the settings you need to tweak your photos. As shown in the video tutorial, you can easily make your photos look awesome (or maybe even add HDR-like effect) from RAW images while JPEGs not so much.
If you own an Android device that is capable of taking RAW images, I highly recommend you to start taking advantage of it and take better photos, it may come in handy the next time you use your phone to take an important moment in your life.
Here’s a example of what RAW images can do for you:
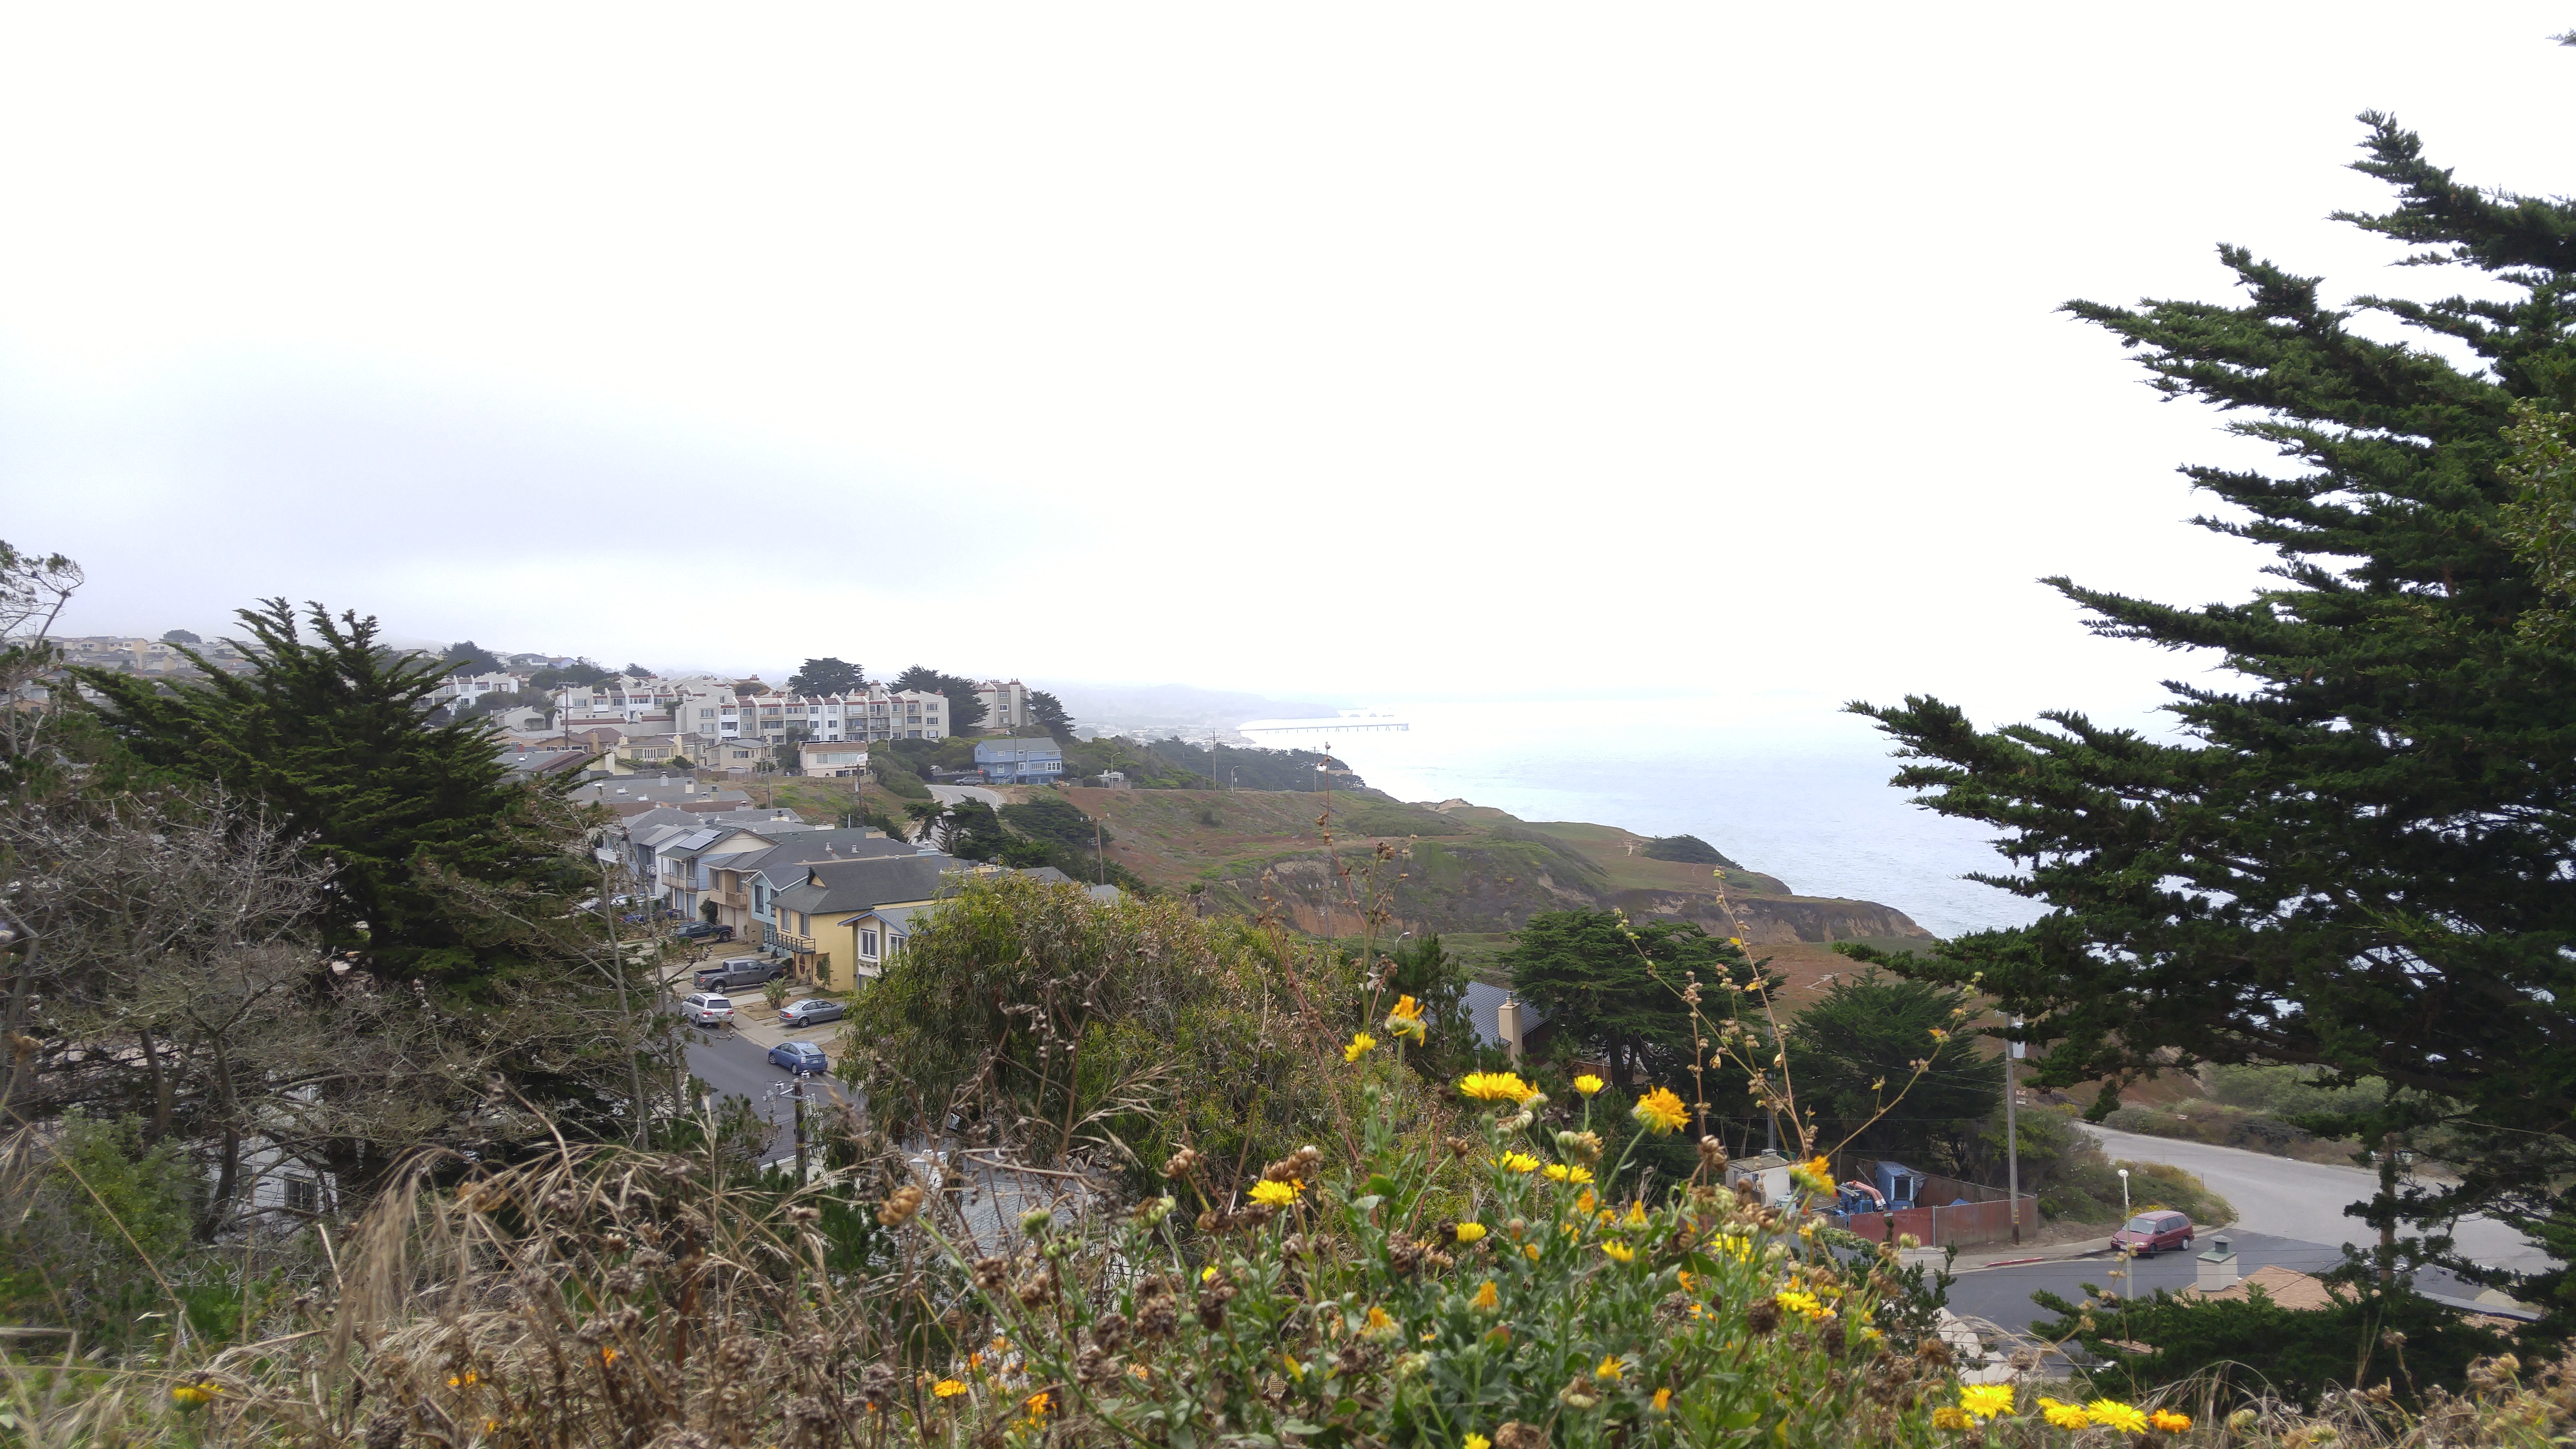
(Original JPEG file of my backyard.)
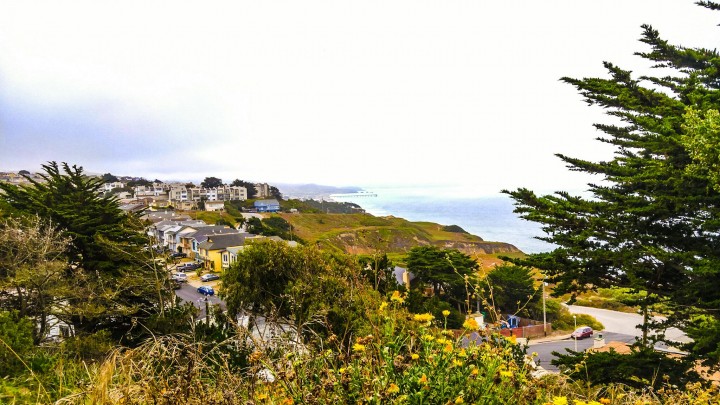
(Edited JPEG file of my backyard using JPEG image file)
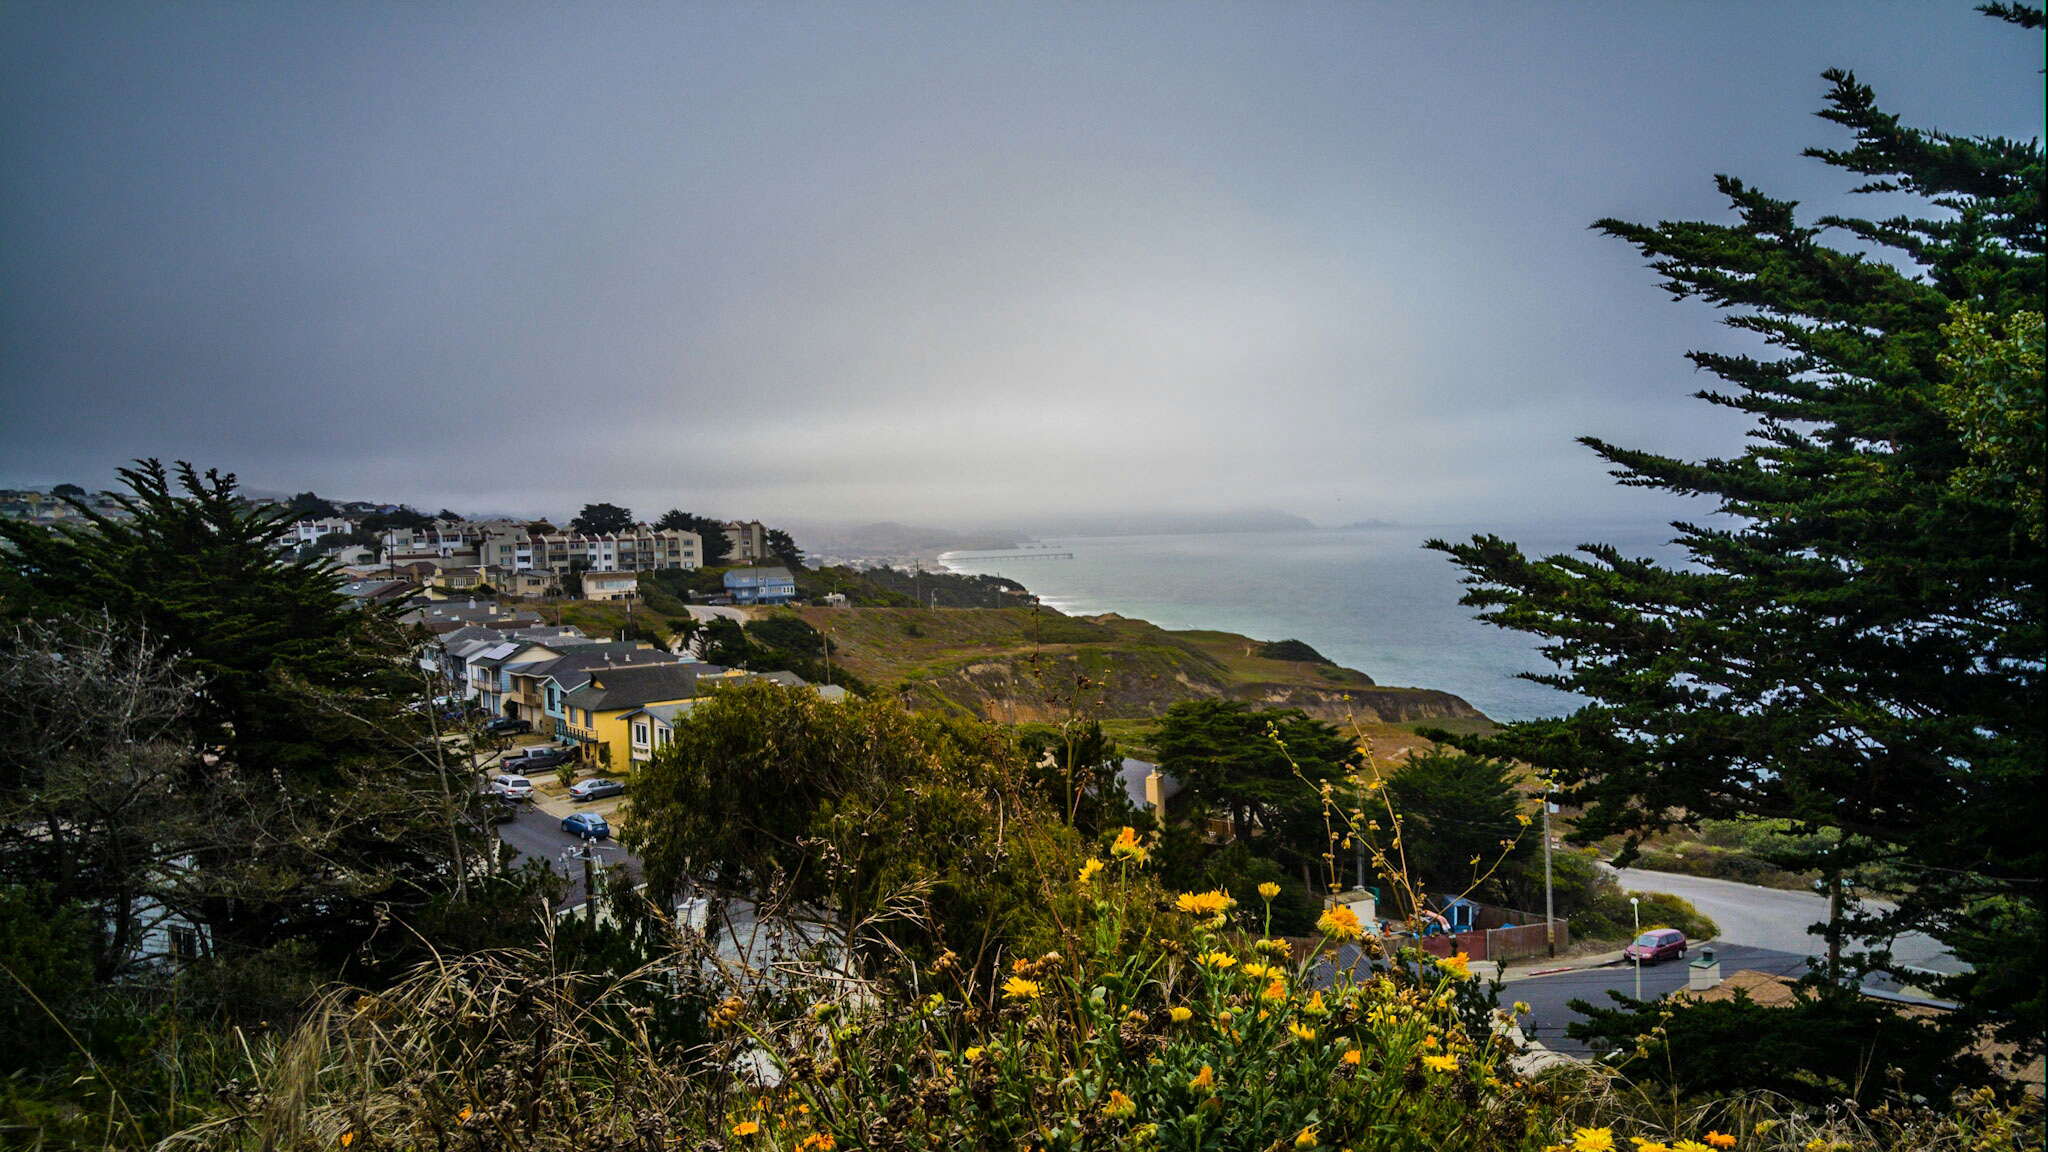
(Edited JPEG file of my backyard using RAW image file)
Need a good camera app for shooting RAW? Check out Camera FV-5 app.
Have a question?
Please post all your questions at the new Android Rehab Center at HighOnAndroid Forum, thank you for understanding!Join the HighOnAndroid VIP Fans List for free help from Max and discounts on Android accessories.