For those of you who want to root your Samsung Galaxy S9 or S9 Plus, here’s a step-by-step tutorial on how to root your Samsung Galaxy S9 or S9 Plus along with a full video tutorial you can follow.
UPDATE: This is for Android 8.0 Oreo, for Android 9.0 Pie, please see updated guide on How to Root Galaxy S9/S9+ on Android 9.0 Pie instead!
Why You Shoot Root Galaxy S9 or S9 Plus?
First, rooting allows you to have full “admin” access to your Samsung Galaxy S9/S9 Plus. A full root also gives you custom recovery like TWRP recovery, which allows you to fully change software with custom ROMs. You will also be able to run slew of rooted apps such as Titanium Backup app to backup all your apps, game apps that support game cheats, or maybe even upgrade to Galaxy S10 software next year when Samsung comes out with the Galaxy S10.
Does rooting make you lose SamsungPay and data?
Yes, rooting involves flashing custom recovery on your Galaxy S9 or S9 Plus, meaning you will most likely set off the Knox counter and SamsungPay will permanently be disabled. However, you will still be able to use GooglePay(AndroidPay) by using Magisk to root when it is available(this root tutorial currently uses SuperSU).
UPDATE: You can now root using Magisk, if you already rooted using our root guide on this page, please see How to Install/Switch to Magisk Root on Galaxy S9/S9 Plus to switch easily from SuperSU to Magisk. For everyone else, simply use the modified Magisk in place of SuperSU when rooting your S9/S9 Plus and everything else is the same.
UPDATE2: You will need to use updated RMM State Bypass, please use this file instead of RMM State Bypass. See Step 19 for details.
Rooting also requires you to format data, meaning you will lose EVERYTHING on your phone including personal files and apps/app data. You can use Samsung Switch app to backup most things including your apps and personal files as shown in this tutorial.
What is I mess up? Then, you can always follow our guide on How to Unroot Samsung Galaxy S9/S9 Plus w/ Stock Firmware to restore your Galaxy S9/S9 Plus completely back to stock.
This root method supports:
Galaxy S9 – SM-G960F, SM-G960F/DS, Korean SM-G960N
Galaxy S9 Plus – SM-G965F, SM-G965F/DS, Korean SM-G965N
Files you will need:
Download TWRP recovery for Galaxy S9 – Link
Download TWRP recovery for Galaxy S9 Plus – Link
Download ODIN – Link
Download Samsung USB drivers – Link
Download RMM State Bypass zip – Link
Download SuperSU – Link
OR if you want Magisk, download Modified Magisk v16.3 – Link [NEW]
Download Samsung Antiroot Removal Tool – Link
Download No Verify Encrypt zip – Link
Step 1. Make a backup of all your apps, app data, and all the rest of your stuff using Samsung’s Smart Switch app. Rooting involves wiping data, which will ERASE EVERYTHING on your internal storage. If you have important stuff to backup, back it up now.

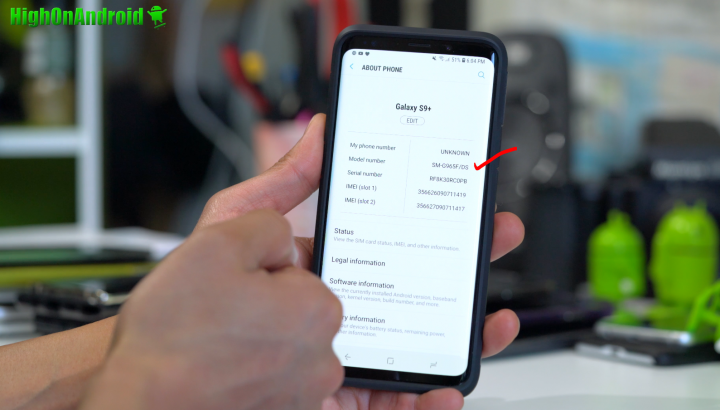
Step 2. Go to Settings->About Phone and check your S9 or S9 Plus model number. Make sure it is one of the supported models.
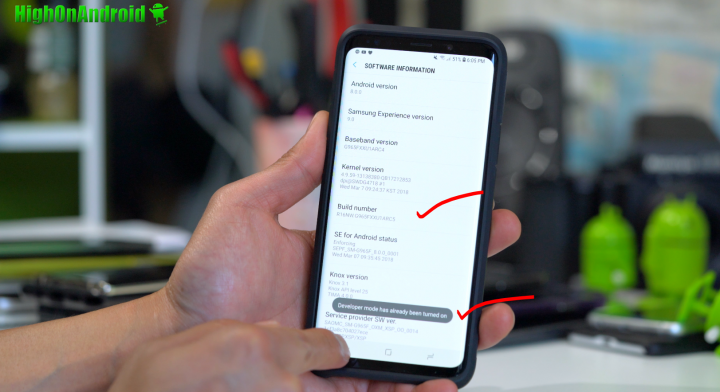
Step 3. Next, tap on “Software Information” and tap on “Build number” about 5 times until it says you are a developer.
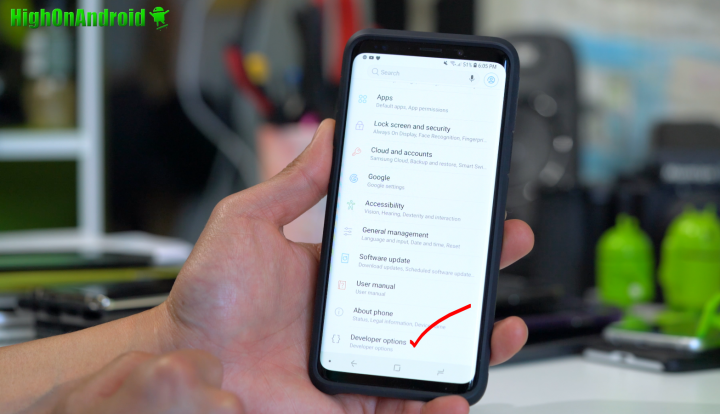
Step 4. Tap on the back button twice, then tap on “Developer options”.
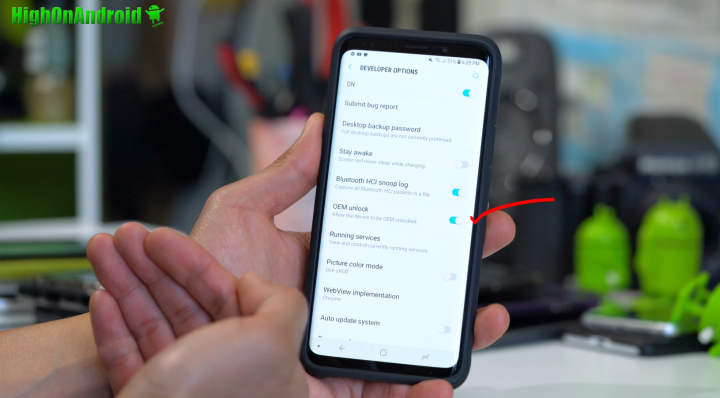
Step 5. If you have had your phone for 7 days(since first time you signed into the phone) you will see “OEM Unlock” option, turn it ON. If you don’t see it, come back in exactly 7 days after the first time you used the phone.
UPDATE: If your Galaxy S9 or S9 Plus wants to do a factory reset, you can do it but DO NOT LET IT REBOOT! Then you won’t be able to flash TWRP recovery and wait 7-days MORE! This just happened to me on my new S9 so I have to wait 7-days AGAIN. How to fix? When your phone reboots after selecting factory reset, IMMEDIATELY HOLD DOWN Volume Down, Bixby, and Power buttons for about 5 seconds until you see a warning screen. Again, if you miss this new crucial step on phones that ask the user for factory reset, YOU WILL HAVE TO WAIT 7 MORE DAYS!
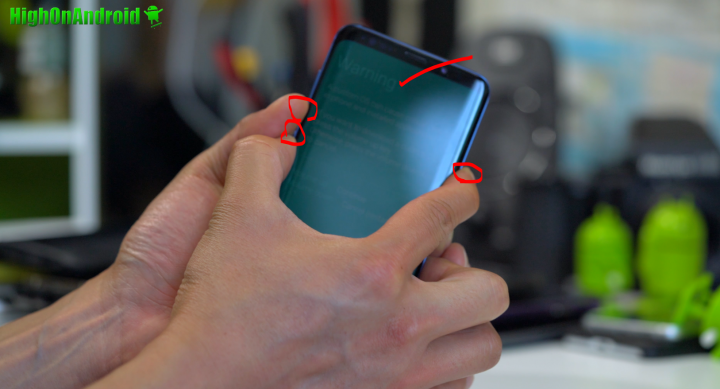
Step 6. Power off your S9 or S9 Plus then hold down Volume Down, Bixby, and Power buttons for about 5 seconds until you see a warning screen.
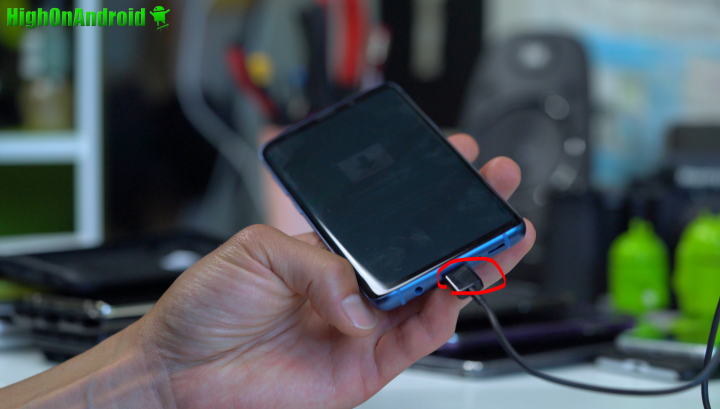
Step 7. Hit the Volume Up button to put into “Download mode” then connect a USB cable from your phone to a Windows computer.
Step 8. Make sure you have downloaded all the files.
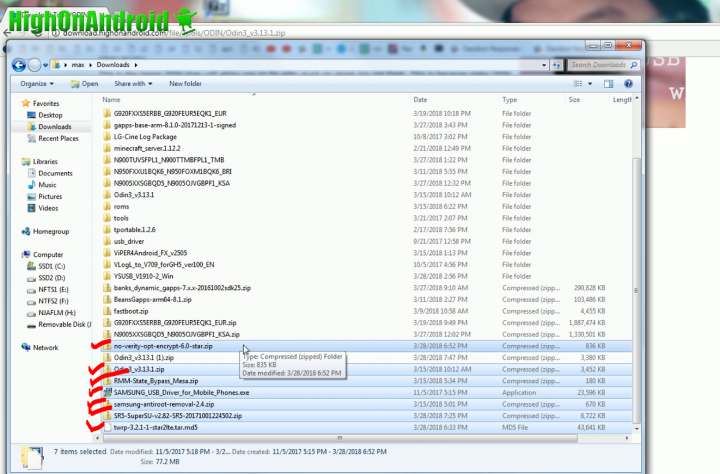
Step 9. Unzip the ODIN zip file FIRST then run the ODIN EXE program.
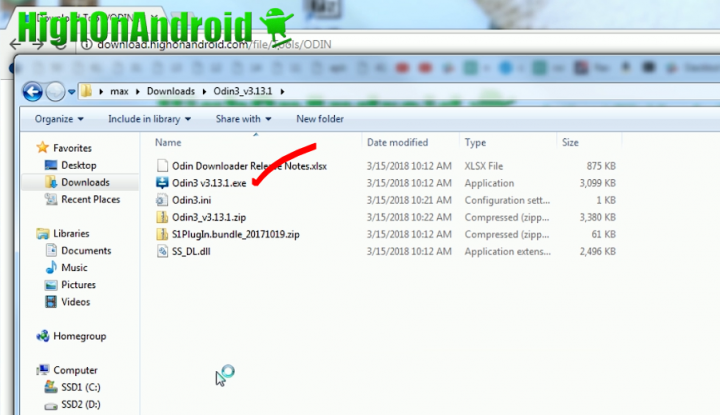
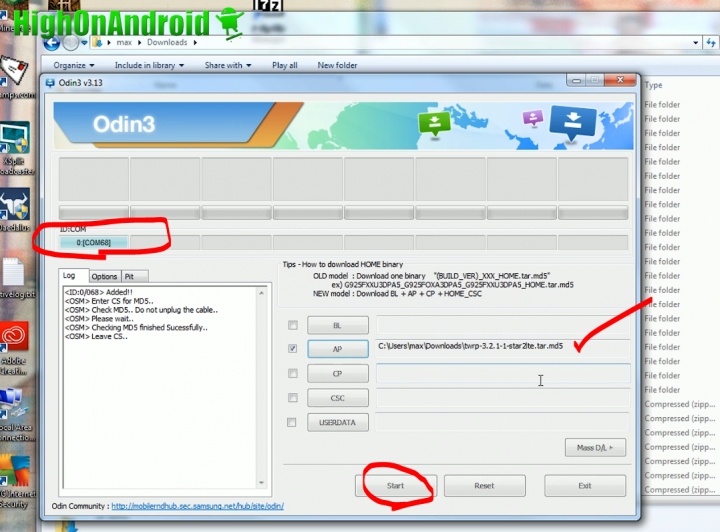
Step 10. Make sure you see a blue-highlighted box like below. If you don’t see it, run the Samsung USB driver EXE program to install drivers then unplug/plug your USB cable back into the phone.
Next, choose “AP”, and choose the TWRP recovery file you downloaded earlier.
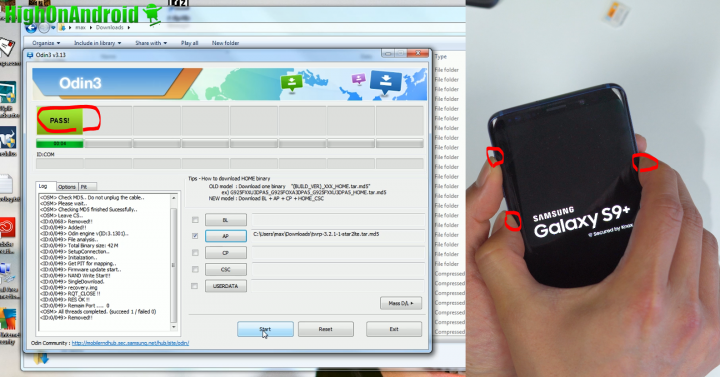
Step 11. Hit “Start” and immediately after your phone reboots(screen goes blank) hold down Volume Up, Bixby, and Power buttons together for about 5 seconds. MAKE SURE YOU DO THIS RIGHT FIRST TIME OTHERWISE YOU WILL HAVE TO REFLASH STOCK FIRMWARE AND WAIT 7 DAYS!!! Watch my video tutorial first if this is your first time and practice several times so you get it right.
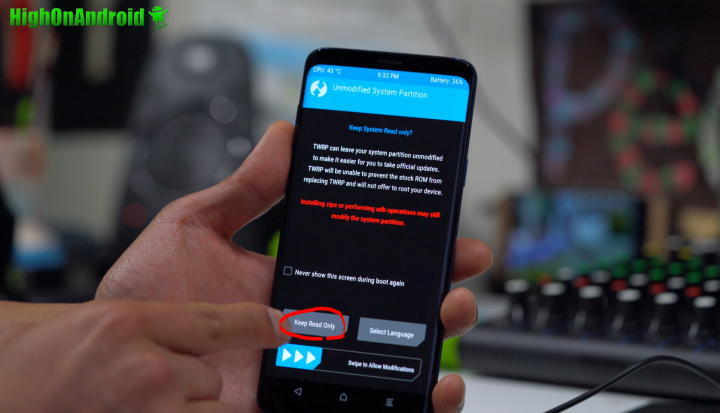
Step 12. Once booted into TWRP, choose “Keep Read Only”.

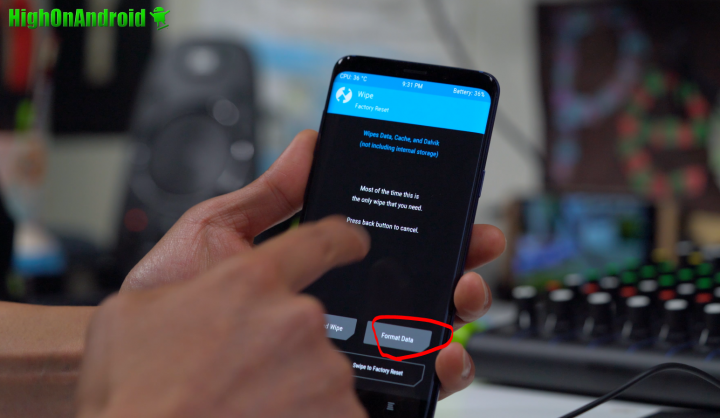
Step 13. Format data using the Wipe menu.
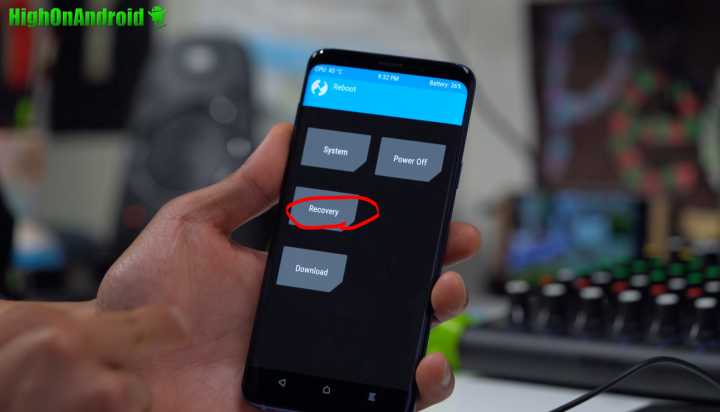
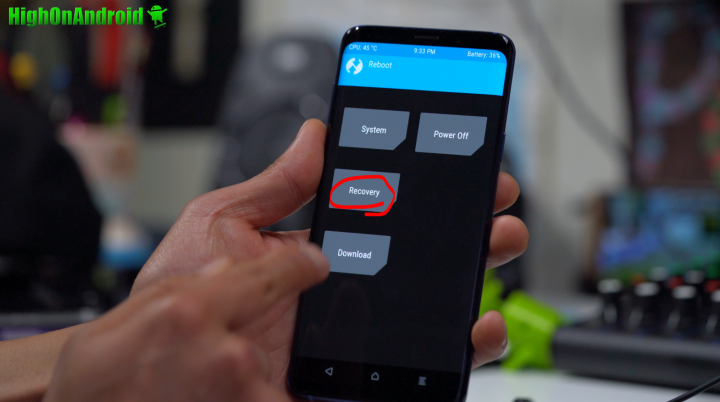
Step 14. Reboot into recovery using the Recovery menu.
Step 15. Choose “Keep Read Only”.
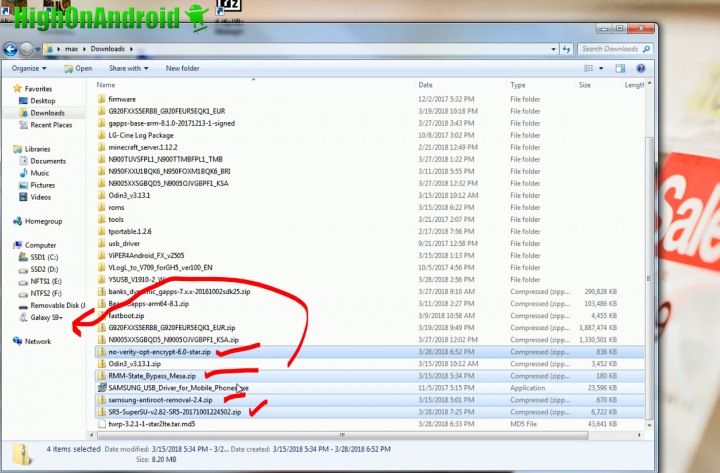
Step 16. Copy over the files shown below over to your S9 or S9 Plus.
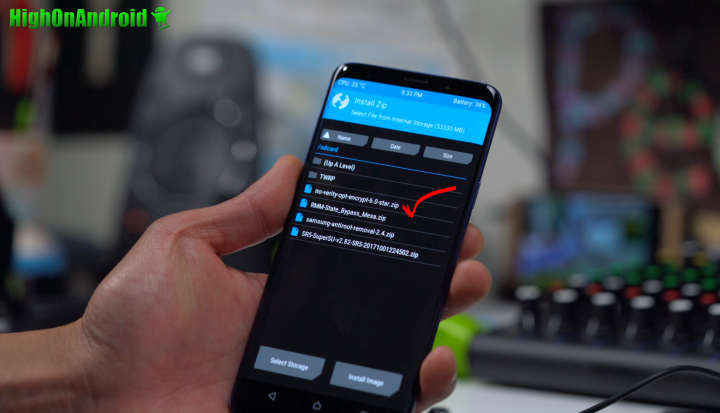
Step 17. Install No Verify Encrypt zip file using Install menu.
Step 18. Reboot into Recovery using the Reboot menu.
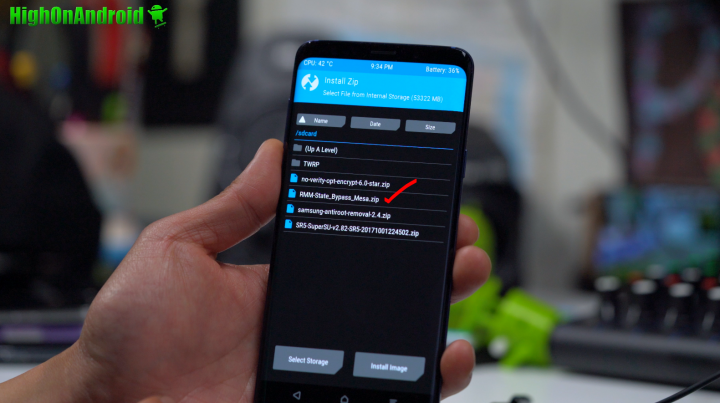
Step 19. Install the RMM State Bypass zip file using Install menu.
UPDATE: With newer Samsung update, you will need to use the updated RMM State Bypass/Magisk combo here.
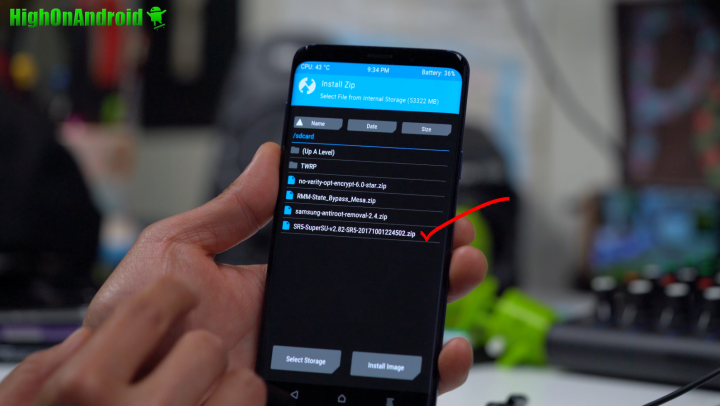
Step 20. Install SuperSU and Samsung Anti Root zip using Install menu.
UPDATE – There is a new modified Magisk v16.3 you can use now to get Magisk root, download the modified Magisk v16.3 in the download section of this page and install that instead of SuperSU. DO NOT USE official versions of Magisk as they DO NOT support Galaxy S9/S9 Plus yet and will brick your phone.
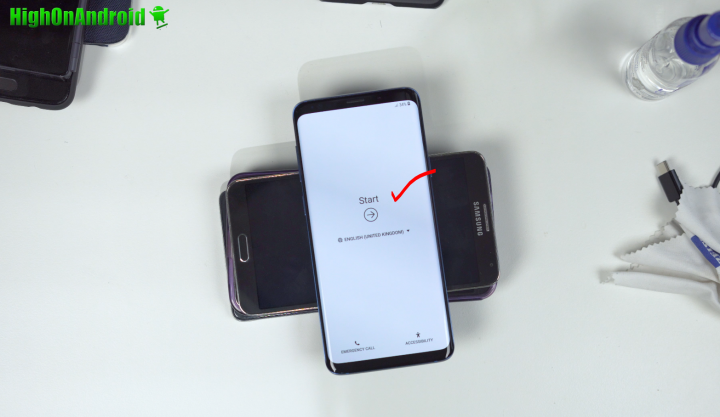
Step 21. Reboot and you should see welcome screen like below after about 5 minutes. Sign in.
Step 22. Once signed in, you should see SuperSU app in your app drawer. Congrats!
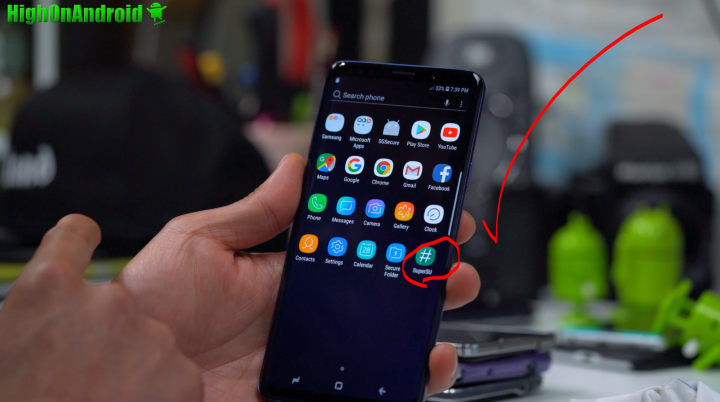
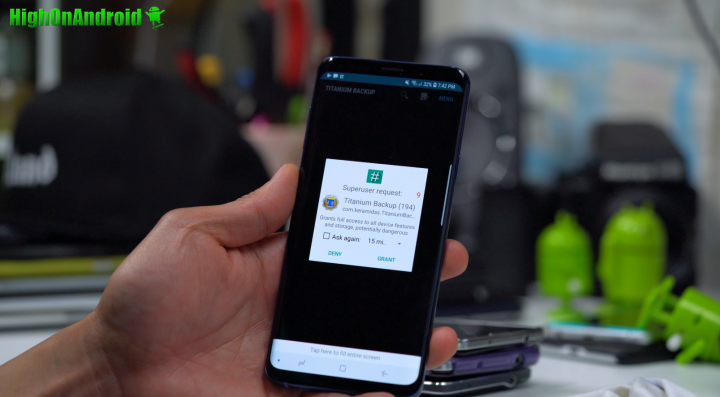
Step 23. You can verify you have full root by running free Titanium Backup app from the Play Store. If you see Superuser request window like below, CONGRATULATIONS, you have successfully rooted your Galaxy S9 or S9 Plus!
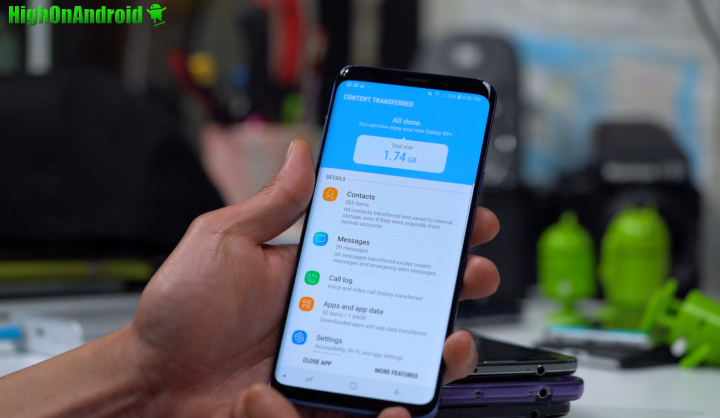
Step 24. Using Smart Switch to restore all your apps and etc…
Credits – TWRP
Q&A
Q: Galaxy S9/S9+ root snapdragon? – Can I use this root method on U.S. unlocked Galaxy S9 SM-G960U or Galaxy S9 Plus SM-G965U with Snapdragon?
A: Unfortunately no as this root method is ONLY for Galaxy S9 or S9 Plus that has locked bootloader. All of U.S. models have locked bootloaders. Now, there are a few international Snapdragon models that have unlocked bootloader, those have unlocked bootloader and you can follow this root method as an exception. Otherwise you will want to grab the international models. Also, there is SamFail root method you can use for the U.S. models and developers are working on Safestrap recovery which means custom ROMs may become a possibility. However, SamFail root method will only allow you to re-charge your phone to 80%.
Q: I messed up Step 11 and getting this message, “only official binaries are allowed to be flashed”, what do I do!
A: If you missed Step 11, follow our guide on How to Unroot Samsung Galaxy S9/S9 Plus w/ Stock Firmware to restore your Galaxy S9/S9 Plus completely back to stock. Once that’s done, you will have to wait 7 days to try rooting your S9/S9 Plus again. Unfortunately, Samsung is making it harder and harder for consumers to root their phone by putting 7-day OEM unlock on newer Samsung Galaxy phones. If you don’t like it, please complain to Samsung as they are the ones putting these nasty locks on the phone. Don’t worry, you are not alone, I messed up about 10 times on my first try and took me 6 months to root my phone when Samsung first introduce this OEM Lock 7-day jail. But next time, please pay attention to Step 11 so you get it right the first time and don’t have to go through this nasty process.
Q: How to root Galaxy S9 without a PC?
A: Currently, there is no way to root the Galaxy S9 or S9 Plus without a PC as rooting Galaxy devices usually require the use of ODIN, which is a Windows PC program. However, in the near future, you may be able to root using 3rd party root programs like One Click Root or KingORoot. Of course, we do not recommend those types of root methods as they sometimes can install unwanted spyware or adware. This root method does not involve any spyware or adware so it is the best root method.
Q: Should I root my Galaxy S9 or S9+?
A: That is entirely up to you. But rooting your Samsung Galaxy S9 or S9+ involves installing TWRP recovery, which will set off the KNOX flag and disable Samsung Pay forever. Samsung Pay is very convenient feature and a lot of users depend on this for their credit card purchases. However, rooting does still give you ability to use Google Pay with Magisk(and hiding root from Google Pay), which can work for some people. Before you decide to root, make sure rooting the S9/S9+ gives you the features you need. For example, I personally like to root so I can easily backup and restore apps along with app data, which allows me to easily switch to new phone and have all my apps restored from a previous phone. You can use SmartSwitch but it does NOT save all your app data.
Q: My 4G LTE data is NOT WORKING!
A: You can try setting 4G LTE manually by following our tutorial here.
Have a question?
Please post all your questions at the new Android Rehab Center at HighOnAndroid Forum, thank you for understanding!Join the HighOnAndroid VIP Fans List for free help from Max and discounts on Android accessories.