https://www.youtube.com/watch?v=LD1OlbfHdwE
For those of you who want to root your OnePlus 6, here is the easiest root method even a 10-year old can follow that works on all Windows, Mac, and Linux. Now, before I begin, you will have to unlock the bootloader. If you have not unlocked your bootloader or don’t know what that is, please follow How to Unlock Bootloader on OnePlus 6 first!
UPDATE: There’s an easier root method you can follow, similar but easier, please see How to Root OnePlus 6 w/ TWRP & Magisk!
NOTE: All downloads are at Step 5!!!
By following this root guide, you will get full root on your OnePlus 6 with Magisk and also permanent TWRP recovery so you can install custom ROMs later down the road. This tutorial was hacked together by myself using existing tutorials but they were very complicated so I spent a long time trying to get it simple so anyone can easily root their OnePlus 6. Thanks to all those who have made the root guides, I would not have been able to put this together without them.
Step 1. Once you have unlocked your bootloader, make sure to SIGN IN as if you do not sign into your phone, you will end up in a nasty bootloop.
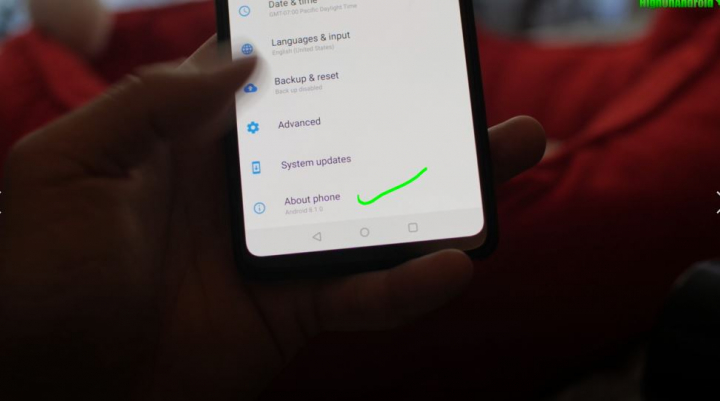
Step 2. Check your Android version in Settings->About Phone just in case you are reading this in the future when Android 9.0 comes out but this tutorial is future-proof and will work on future Android versions so long as you use the correct boot image file.
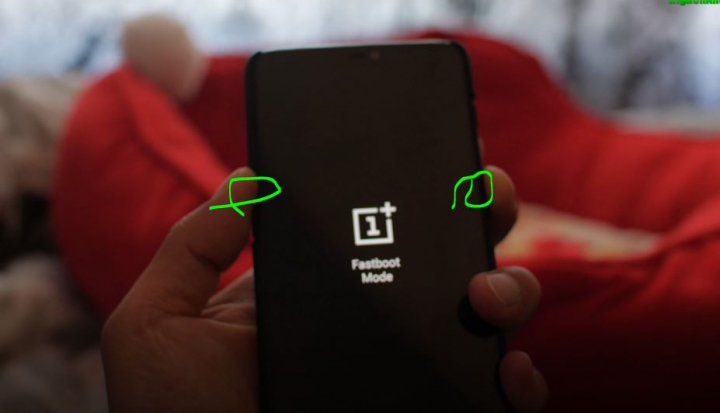
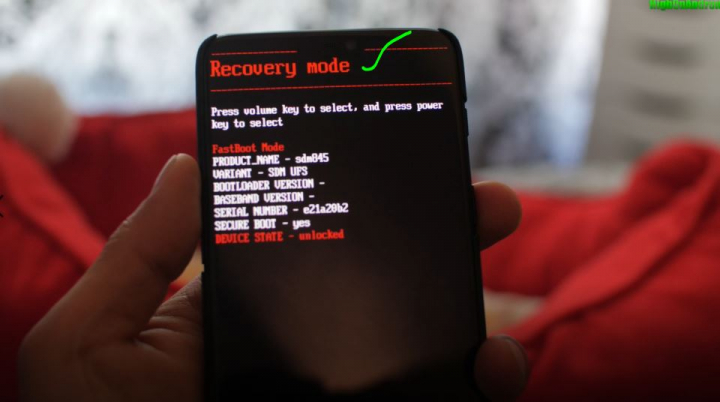
Step 3. Power off your phone and hold down Volume Up and Power buttons for about 3 seconds until you enter the Fastboot mode. When doing this, make sure your USB cable is disconnected otherwise you may enter another special mode for unbricking. If you mess up and get into that special mode, simply reboot your device by holding down Volume Down and Power buttons for about 20 seconds.
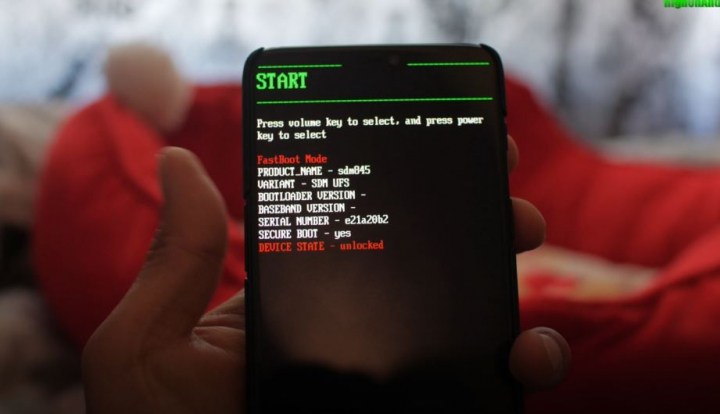
Step 4. Once in fastboot mode, connect a USB cable from your OnePlus 6 to your computer. You can use Windows, Mac, or Linux. For my video tutorial, I will be using Windows 10 but you can go ahead and use the substitute code for Mac or Linux as most of the steps are nearly identical.
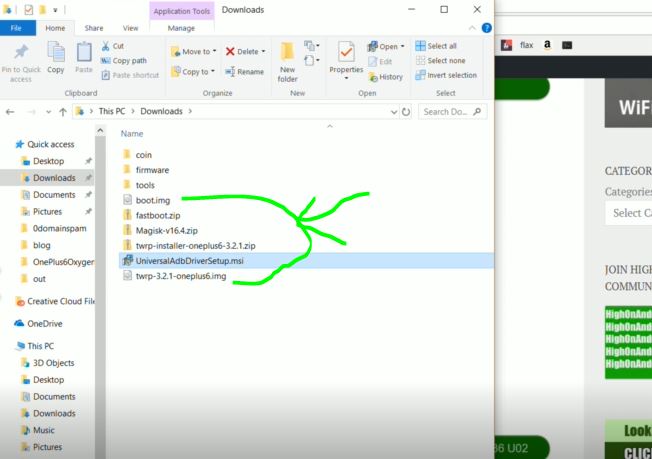
Step 5. You will need to download:
- Download fastboot.zip & Android USB Drivers for Windows
- Download Magisk, TWRP image, TWRP zip, and boot.img for OnePlus 6T
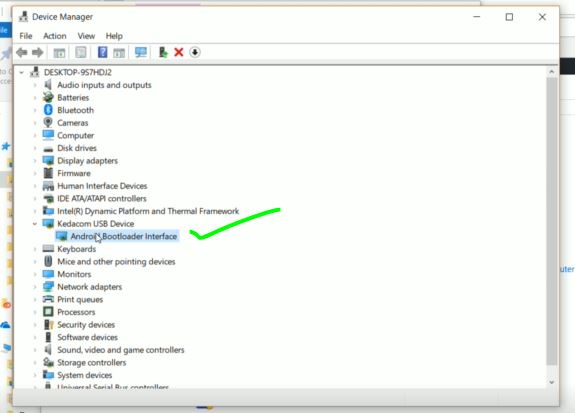
Step 6. If you have followed my bootloader unlock tutorial and installed drivers for Windows, you can skip this step. If not, you can go head and run the Android USB Driver program and install drivers. For Mac or Linux, no drivers are needed!
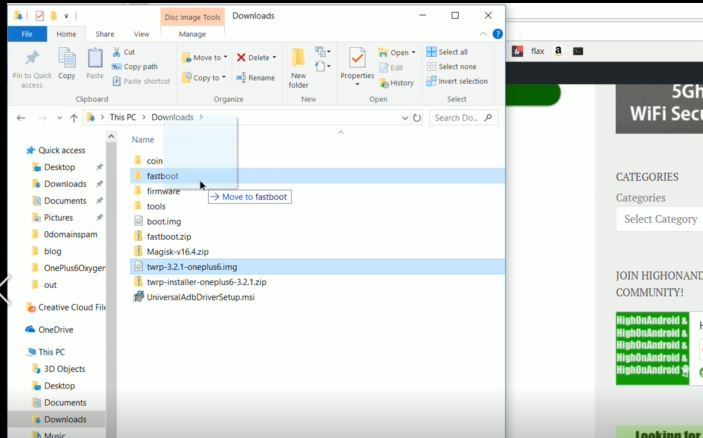
Step 7. Unzip fastboot.zip and move over the TWRP image file you downloaded earlier to the fastboot folder.
Step 8. Open a command prompt for Windows by typing “cmd” in the search bar. For Mac or Linux, open a terminal, if you don’t know how, please Google it.
Step 9. Type the following.
For Windows:
cd Downloads
cd fastboot
fastboot flash boot twrp twrp-3.2.1-oneplus6.img
For Mac:
cd Downloads
cd fastboot
chmod 755 *
./fastboot-mac flash boot twrp twrp-3.2.1-oneplus6.img
Note: CHMOD command basically changes file permissions so you can run the files.
For Linux:
cd Downloads
cd fastboot
chmod 755 *
sudo ./fastboot-linux flash boot twrp twrp-3.2.1-oneplus6.img
Note: CHMOD command basically changes file permissions so you can run the files.
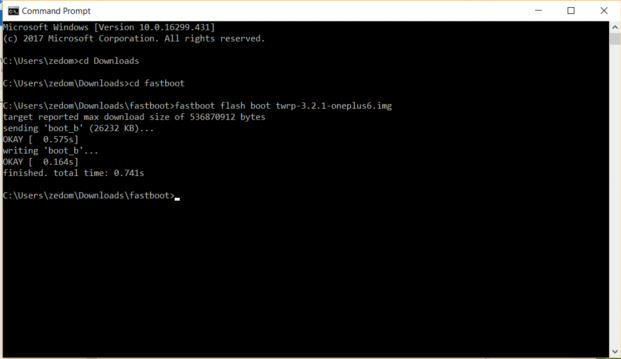
This will flash the TWRP image to your boot partition. Normally, we can simply boot TWRP image but since we don’t have official TWRP recovery(as of writing this), you will have to flash TWRP image to the boot partition, which allows us to boot TWRP recovery.
Step 10. Choose “Recovery” using the Volume keys and hit Power button to enter TWRP recovery.
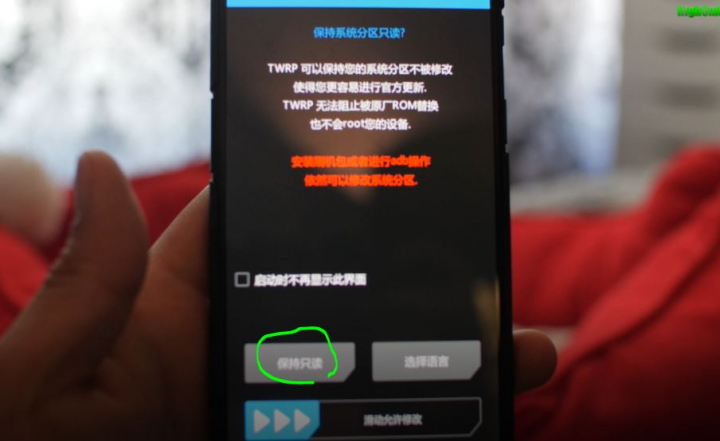
Step 11. Recovery will probably be in Chinese, hit the “Read Only” button as shown here.
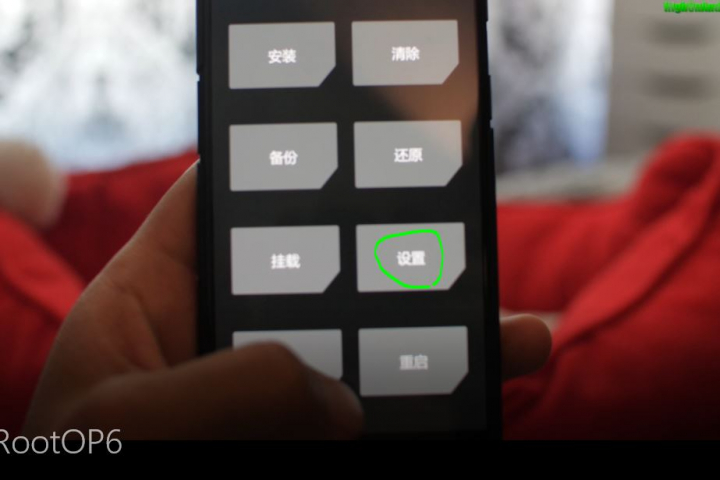
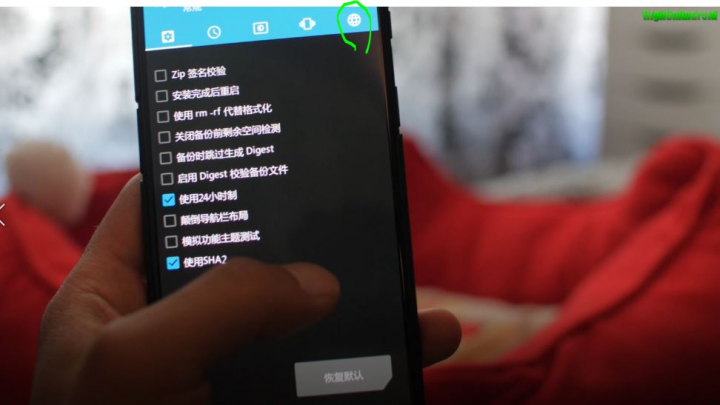
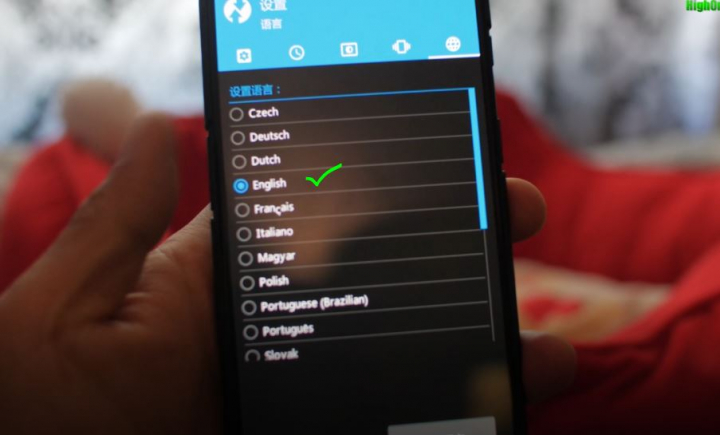
Step 12. You can change the language back to English by following the steps here.
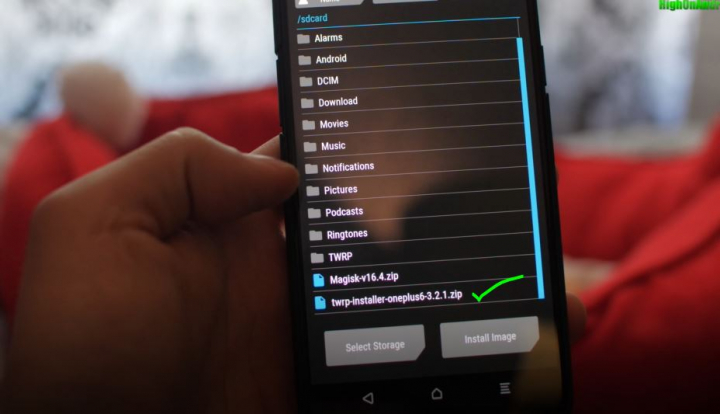
Step 13. Go back to your computer and copy over the TWRP install zip file, Magisk zip file, and boot.img file.
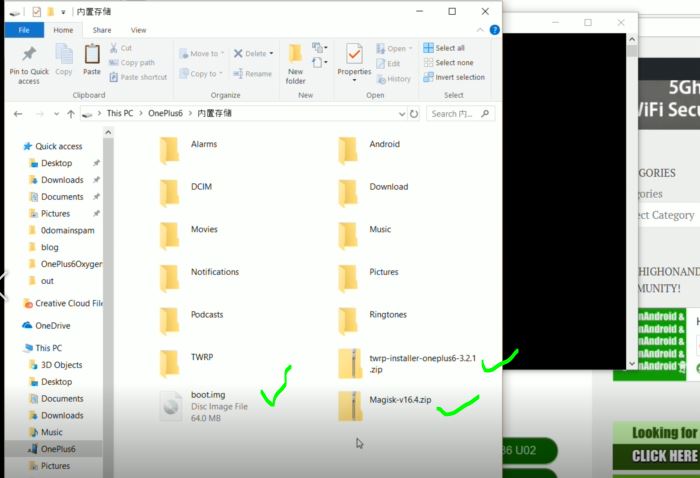
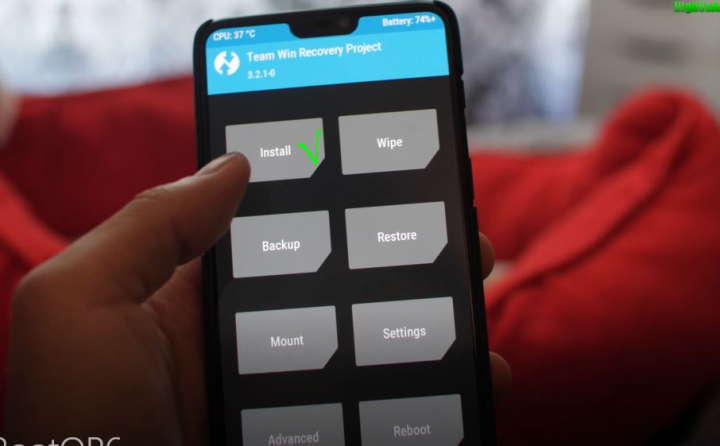
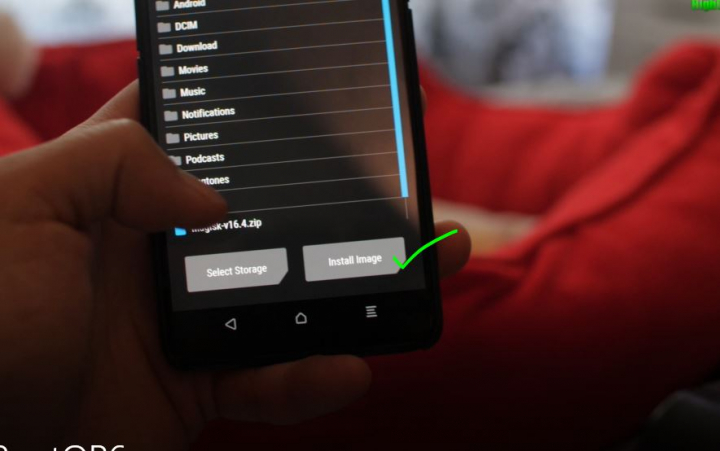
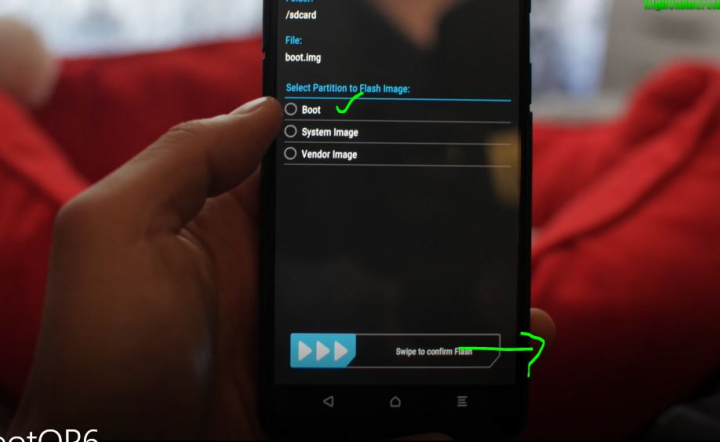
Step 14. You don’t need the USB cable connected anymore. Go ahead and install the boot.img file using the image option in Install menu. This will flash back your regular boot image to the boot partition.

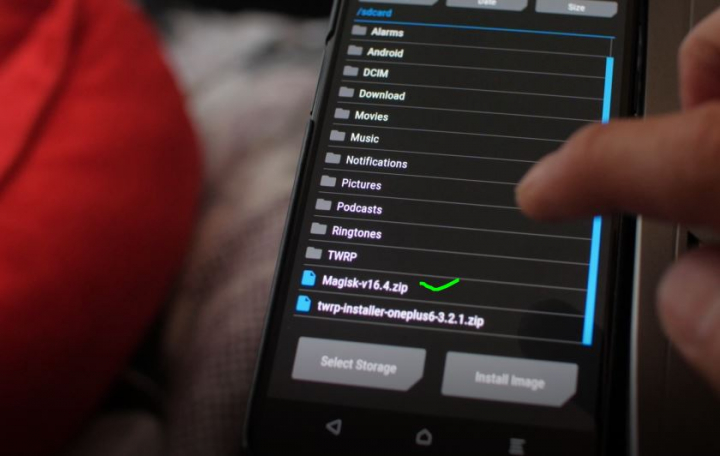
Step 15. Next, install the TWRP install zip and Magisk zip file. This will give you permanent TWRP recovery and full root.
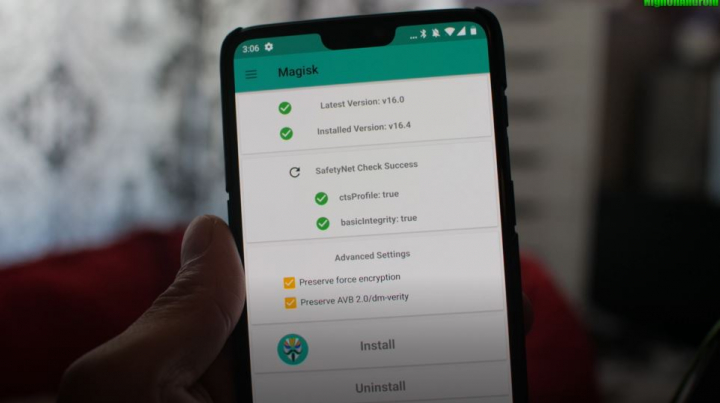
Step 16. Reboot and you should see everything working including WiFi, 4G LTE, yadayadayada. Open Magisk Manager app and find you have full root with SafetyNet pass also so you can hide root.
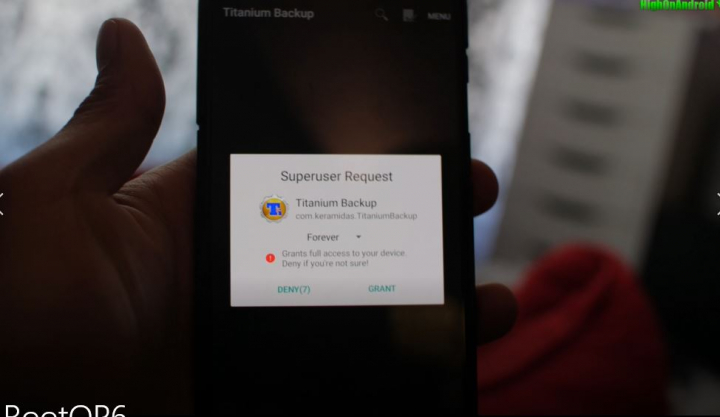
Verify you have full root by installing Titanium Backup app(free app) on the Play Store, you should see a Superuser request window.
That’s it! Enjoy folks!
Credits – XDA
If you guys need help, check out the new HighOnAndroid forum thread here also.
Have a question?
Please post all your questions at the new Android Rehab Center at HighOnAndroid Forum, thank you for understanding!Join the HighOnAndroid VIP Fans List for free help from Max and discounts on Android accessories.